Tutorial: Interface Builder integration in RoboVM
24 Oct 2017 | interface builder tutorialUPDATE: Commercial RoboVM has nice tutorial about IB (still available today). OOS RoboVM implementation has own differences and these are covered in this post.
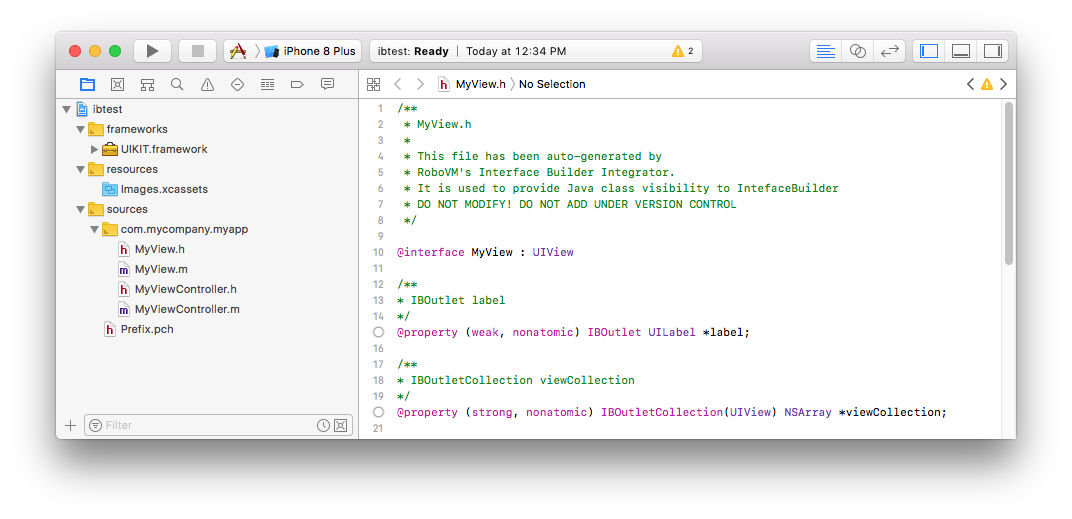
It is not possible to use Java classes with Interface Builder directly. To workaround this dummy objective-c XCode project is generated. This project contains:
UPDATE2: web archive
- objective-c representation of Java classes with exposed Outlet/Action/Collections etc;
- resource tree which includes all resource folders specified in robovm.xml;
- frameworks specified in robovm.xml to allow IB to see their resources as weel;
Disclaimer. This post doesn’t cover UI creation in Interface Builder. Basic knowledge of designing in IB and objective-c would be required to understand properties, outlets etc. Check corresponding page at Apple
Java level code support for Interface Builder integration
IBOutlet
To mark class member to be exposed to Interface builder (and iOS during runtime) it has to be marked as outlet. There is two ways for this: member annotation or setter annotation. In both cases @IBOutlet annotation to be used:
public class MyView extends UIView {
    // member way to IBOutlet
    @IBOutlet UILabel label;

    // setter way to IBOutlet
    UIButton button;
    @IBOutlet public void setButton(UIButton button) {
        this.button = button;
    }
}
IBOutletCollection
Similar to IBOutlet both member or setter options can be used. IBOutletCollection shell use NSArray receiving type:
public class MyView extends UIView {
    @IBOutletCollection NSArray<UIView> viewCollection;
}
IBInspectable
It was added altogether with @IBDesignable. Last is not supported in RoboVM but anyway IBInspectable turns User Defined attributes of view into nice and shiny fields in Interface Builder. Following types can be used with this annotation as per apple:
You can add the IBInspectable attribute to any property in a class declaration, class extension, or category of type: boolean, integer or floating point number, string, localized string, rectangle, point, size, color, range, and nil
In java it is simple as bellow:
public class MyView extends UIView {
    @IBInspectable UIColor color;
}
IBAction
Marks method for generation as IBAction in IB shall be annotated. It shall either be parameterless or take one argument of UIControl type:
public class MyView extends UIView {
    @IBAction  public void onClick(UIControl e){
    }

    @IBAction  public void onClick() {
    }
}
CustomClass
This annotation for class is required to give native side obj-c class nice name (otherwise it will receive something like this j_com_mycompany_myapp_MyView) and also tells compiler to generate constructor callbacks.
Step by step tutorial
- Create new project: RoboVM iOS application without storyboards
- Add new class
MyView.javaand put following content into it@CustomClass("MyView") public class MyView extends UIView { // member way to IBOutlet @IBOutlet UILabel label; // setter way to IBOutlet UIButton button; @IBOutlet public void setButton(UIButton button) { this.button = button; } @IBOutletCollection NSArray<UIView> viewCollection; @IBInspectable UIColor color; @IBAction public void onClick(UIControl e){ } @IBAction public void onClick() { } } -
Annotate
MyViewControllerclass with@CustomClass("MyViewController")as well. Will have benefits from pretty name in later steps - open XCode project.
- in IntelliJ Idea: make sure project module is selected, then follow menu Build->Open XCode
- in Ecplipse: in project tree, right click on project root (project name), follow “Open XCode project” item in context menu

- add new Xib to RoboVM
- right click on
Resourcesfolder - New file…
- select
View - IMPORTANT: in
Save asdialog pay attention to destination folder. It will navigate to generatedrobovm-build/xcode/.ib/folder, make sure to change it to project oneresources/ - save as MyView
- right click on
- in opened IB change type of
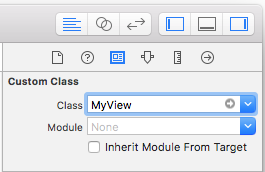
viewtoMyViewinIdentity Inspectorpage

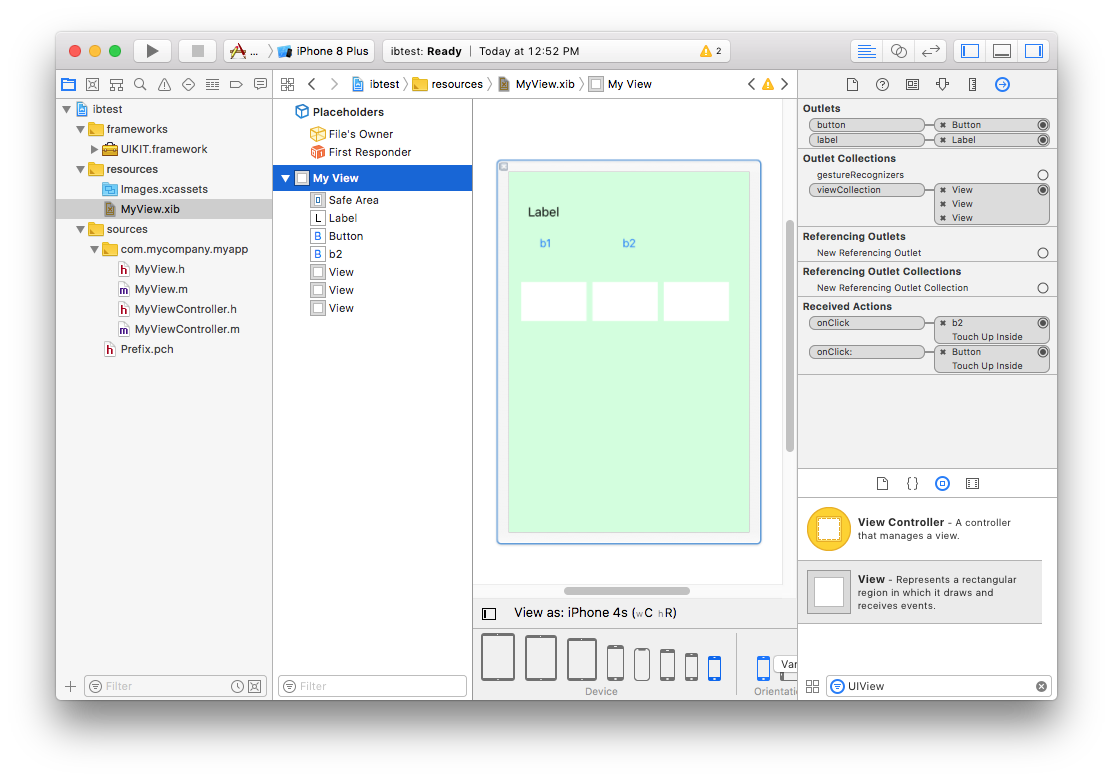
- create simple ui that consist of UILabel, two UIButtons, and 3 UIViews(for collection) and connect them to outlet as shown bellow

-
switch to
Attribute inspectorand there changeMy view -> Colorattribute that is defined to value other than default. That is@IBInspectable UIColor color;member of MyView class; -
change
File's Ownercustom class to MyViewController inIdentity Inspectorpage and connects itsviewoutlet to root View (MyView) - close XCode and navigate back to Idea/Eclipse. Modify MyViewController by removing example data to be empty one as it will be loaded from xib:
@CustomClass("MyViewController") public class MyViewController extends UIViewController { public MyViewController(String nibNameOrNil, NSBundle nibBundleOrNil) { super(nibNameOrNil, nibBundleOrNil); } } - modify Application Delegate to load MyViewController from xib(Main.java):
@Override public boolean didFinishLaunching(UIApplication application, UIApplicationLaunchOptions launchOptions) { // Set up the view controller. rootViewController = new MyViewController("MyView", null); .... } - modify
MyView.javato put life into example:@CustomClass("MyView") public class MyView extends UIView { ... @IBAction public void onClick(UIControl e){ label.setText("***"); label.setTextColor(color); } @IBAction public void onClick() { for (UIView v : viewCollection) v.setBackgroundColor(color); } }
Run it and it shall react to button.
Important Note:
- once there is any change in java file it will not be automatically applied to generated XCode project. It has to be re-generated by telling idea/eclipse to open project again (Build->Open XCode). XCode can be kept opened and will re-load items automatically (no need to close and open it)
- generated .m/.h files shall not be edited. As these changes will not reflect java part. Generated Objective-C sources are used only to allow editing xib/storyboards and not used for any other purpose


Comments