


Compose UI with RoboVM
05 Aug 2026 | compose kotlin hacks tutorialTLTR: sample project - codesnippets/compose-demo-app.
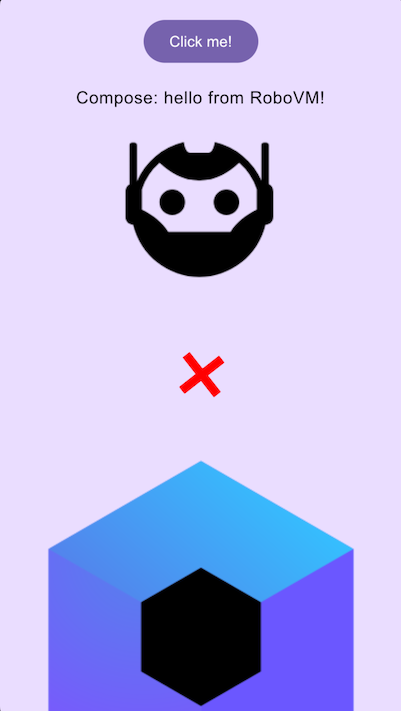
Compose Multiplatform has already been on iOS for a while. The issue is that it’s powered by Kotlin Native, which means the Java ecosystem isn’t available around it. On the other hand, RoboVM provides a JVM flavor on iOS, but it lacks the AWT/Swing support needed to run the Desktop target of Compose Multiplatform natively.
Before trying to run Compose Multiplatform on RoboVM, let’s dive into its layers:
Compose Multiplatform - UI framework for Kotlin
↓ ↓ ↓
Skiko - Kotlin Multiplatform bindings to Skia
↓ ↓ ↓
Skia - the 2D Graphics Library by Google
Anything related to Kotlin Native is not directly re-usable on the RoboVM/JVM side, though these targets serve as a nice reference (how-to). A quick look through the repositories yields the following useful findings:
Compose Multiplatform
The only re-usable part is the Desktop JVM target. It was built around AWT/Swing (currently isolated in the Skiko.AWT dependency). Because this is the only option, it will be the focus target for RoboVM.
Skiko
- [OK] Skiko.AWT comes as the next logical step. It’s a JVM-based target that contains JNI bindings and infrastructure to run Skia on the JVM.
- [BAD] However, it heavily depends on AWT/SWING, which is unnecessary for our use case.
- [OK]
Skiko.Native.Ios, on the other hand, usesKotlin.interopto call Skia C++ code directly. Unlike AWT, it is Metal-based and seems simpler. - [GREAT]
Skikocan work with Metal directly in both Native.IOS and JVM.MacOSx;BackendRenderTarget.makeMetal()produces a render target right from a Metal texture pointer.
Skia
- [GREAT]
Skikouses pre-compiled binaries ofSkiafor each target, and there are ones available for iOS under Native.IOS that can be re-used.
Everything looks good so far, and the plan is to:
- Make a
Skikoport to RoboVM and run its Skiko-level sample; - Adapt and use the Compose Multiplatform Desktop.JVM target to run Compose UI on RoboVM.
Skiko for RoboVM
The following tasks need to be done:
- Extend the
buildSrcinfrastructure to introduce arobovmtarget; - The
robovmtarget should reuseSkiko'sJVM target code and JNI bindings to Skia; - Exclude
AWT-related JVM code from theRoboVMtarget; - The
Kotlin Native/iOScode that createsUIView,metalLayerand wraps its pointer into aBackendRenderTargetshould be directly ported using RoboVM CocoaTouch bindings while keeping the exact functionality and API.
Bottom line: robovm = JVM without AWT/Swing + Kotlin Native/iOS ported into CocoaTouch bindings.
Coding agents were a great help in setting up the buildSrc infrastructure and porting the code to RoboVM (they did 99% of the code typing work). The only thing left was to make it work! :)
With some effort put into Skiko, it was possible to run Skiko’s sample code on RoboVM:
Screen:
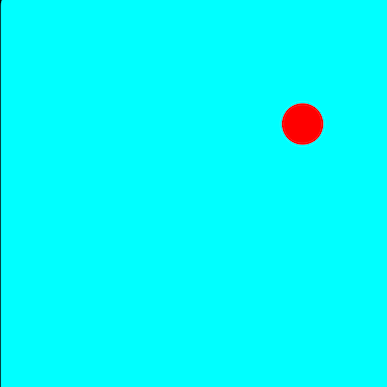
override fun didFinishLaunching(application: UIApplication?, launchOptions: UIApplicationLaunchOptions?): Boolean {
    val rootViewController = SkikoViewController {
        val layer = SkiaLayer().apply {
            renderDelegate = SkiaLayerRenderDelegate(this, object : SkikoRenderDelegate {
                val paint = Paint().apply { color = Color.RED }
                override fun onRender(canvas: Canvas, width: Int, height: Int, nanoTime: Long) {
                    canvas.clear(Color.CYAN)
                    val ts = nanoTime / 5_000_000
                    canvas.drawCircle((ts % width).toFloat(), (ts % height).toFloat(), 20f, paint)
                }
            })
        }
        SkikoUIView(layer).also { layer.needRedraw() }
    }

    val window = UIWindow(UIScreen.getMainScreen().getBounds())
    this.window = window
    window.rootViewController = rootViewController
    window.makeKeyAndVisible()

    return true
}
Skiko for RoboVM is pushed to GitHub at robovm-skiko and its snapshot ready-to-use artifact is available on the Sonatype repository:
  dependencies {
      implementation("io.github.dkimitsa.robovm:skiko-iosrobovm:0.144.6-SNAPSHOT")
  }
Compose Multiplatform for RoboVM
Since the Desktop.JVM target is the way to go, let’s start by adding the corresponding dependencies and try to compile and run them on RoboVM:
buildscript {
    ext.robovm_version = '10.2.2.5-SNAPSHOT'
    ext.kotlin_version = '2.2.0'
    ext.compose_version = '1.11.1'
    // ...
}
dependencies {
    // ...

    implementation("io.github.dkimitsa.robovm:skiko-iosrobovm:0.144.6-SNAPSHOT")
    implementation "io.github.dkimitsa.robovm:kotlinx-coroutines-robovm:1.9.0.1"
    implementation "androidx.collection:collection-jvm:1.4.3"
    implementation "org.jetbrains.kotlinx:kotlinx-coroutines-core:1.10.1"

    // Compose for Desktop
    implementation "org.jetbrains.compose.runtime:runtime:${compose_version}"
    implementation "org.jetbrains.compose.runtime:runtime-desktop:${compose_version}"
    implementation "org.jetbrains.compose.ui:ui-desktop:${compose_version}"
    implementation "org.jetbrains.compose.ui:ui-geometry-desktop:${compose_version}"
    implementation "org.jetbrains.compose.ui:ui-graphics-desktop:${compose_version}"
    implementation "org.jetbrains.compose.ui:ui-text-desktop:${compose_version}"
    implementation "org.jetbrains.compose.ui:ui-unit-desktop:${compose_version}"
    implementation "org.jetbrains.compose.foundation:foundation-desktop:${compose_version}"
    implementation "org.jetbrains.compose.material:material-desktop:${compose_version}"
}
The first results were a bit messy because it pulled in Skiko.AWT (which ends up being used at the same time as Skiko.RoboVM). This messes up the actual functions of Skiko (e.g., the first one resolved from the dependency list is used).
The fix is to aggressively exclude Skiko.AWT from the dependencies:
configurations.all {
    exclude group: 'org.jetbrains.skiko', module: 'skiko-awt'
    exclude group: 'org.jetbrains.skiko', module: 'skiko-awt-runtime-macos-arm64'
    exclude group: 'org.jetbrains.skiko', module: 'skiko-awt-runtime-macos-x64'
    exclude group: 'org.jetbrains.skiko', module: 'skiko-awt-runtime-windows-x64'
    exclude group: 'org.jetbrains.skiko', module: 'skiko-awt-runtime-linux-x64'
}
At this point, the RoboVM code becomes compilable, and it’s time to play with the Compose code. To start, it’s required to wire up Skiko with Compose and provide a SkikoLayer to the Compose runtime:
@OptIn(InternalComposeUiApi::class)
class RoboVmComposeView(layer: SkiaLayer = SkiaLayer(), content: @Composable () -> Unit): SkikoUIView(layer) {
  private val scene = PlatformLayersComposeScene(coroutineContext = Dispatchers.Main + DefaultMonotonicFrameClock)
  init {
    scene.setContent(content)
    layer.renderDelegate = SkiaLayerRenderDelegate(layer) { canvas, width, height, nanoTime ->
      canvas.clear(Color.WHITE)
      scene.size = IntSize(width, height)
      scene.render(canvas.asComposeCanvas(), nanoTime)
    }
    layer.needRedraw()
  }

  override fun touchesBegan(touches: NSSet<UITouch>, event: UIEvent?) {
    super.touchesBegan(touches, event)
    sendPointerEvent(touches, PointerEventType.Press, event)
  }

  override fun touchesMoved(touches: NSSet<UITouch>, event: UIEvent?) {
    super.touchesMoved(touches, event)
    sendPointerEvent(touches, PointerEventType.Move, event)
  }

  override fun touchesEnded(touches: NSSet<UITouch>, event: UIEvent?) {
    super.touchesEnded(touches, event)
    sendPointerEvent(touches, PointerEventType.Release, event)
  }

  override fun touchesCancelled(touches: NSSet<UITouch>, event: UIEvent?) {
    super.touchesCancelled(touches, event)
    sendPointerEvent(touches, PointerEventType.Release, event)
  }

  private fun sendPointerEvent(touches: NSSet<UITouch>, eventType: PointerEventType, event: UIEvent?) {
    val touch = touches.any() ?: return
    val point = touch.getLocationInView(this)

    val timeMillis = ((event?.timestamp ?: 0.0) * 1000).toLong()
    scene.sendPointerEvent(
      eventType = eventType,
      position = Offset(point.x.toFloat(), point.y.toFloat()),
      type = PointerType.Touch,
      timeMillis = timeMillis
    )
  }
}
Here we create a ComposeScene that accepts @Composable content and connect it with the SkikoLayer to render it on the Skia canvas and redirect input events to it.
Now Compose code can be used in the RoboVM application:
SkikoViewController {
  RoboVmComposeView {
    Text("Hello RoboVM Compose!")
  }
}
Long story short: after hours of debugging and crash fixes, the content was displayed!
And the best part is that it didn’t require any changes to the Compose Multiplatform (desktop) framework!
For a better experience, all compose-related interop code and dependency management have been separated into the robovm-compose-interop library.
It defines all the required Compose Multiplatform (desktop) and skiko dependencies (and doesn’t expose skiko), excludes skiko-awt, and provides RoboVmComposeView and RoboVmComposeViewController which hide the dependency on skiko.
Usage:
Gradle dependency:
implementation "io.github.dkimitsa.robovm:robovm-compose-interop:1.11.1.0-SNAPSHOT"
Simple Compose app:
    override fun didFinishLaunching(application: UIApplication?, launchOptions: UIApplicationLaunchOptions?): Boolean {
        val rootViewController = RoboVmComposeViewController {
            Box(Modifier.fillMaxSize(), contentAlignment = Alignment.Center) {
                Text("Hello World")
            }
        }

        val window = UIWindow(UIScreen.getMainScreen().getBounds())
        this.window = window
        window.rootViewController = rootViewController
        window.makeKeyAndVisible()

        return true
    }
Bottom line
Compose Multiplatform is possible on RoboVM; text, images, buttons, layouts, gestures, animation, etc., all work. Of course, not everything has been tried yet, and this is more of a proof of concept than production-ready code.
Tutorial: Best approach to set up a project with Compose preview in IntelliJ IDEA
While it is possible to set up the project as a single-module project, compile it, and run it from IntelliJ IDEA, the experience is not great:
- IDEA doesn’t recognize it as a Compose project;
- It doesn’t provide a Compose preview;
- It shows “Kotlin not configured”;
- It marks
@Composableblocks with errors like:Argument type mismatch: actual type is ‘() -> Unit’, but ‘androidx.compose.runtime.internal.ComposableFunction0
' was expected.
Instead, for a quick start, it is better to set up a new Compose Multiplatform project in IntelliJ IDEA using the wizard:
- Do not select the iOS target (as we are not interested in the Kotlin Native/iOS target);
- Select the Desktop (JVM) or Android target (for preview purposes only).
This will create a project with the shared and desktopApp modules. At this point, the desktopApp folder can be completely deleted, and the module can be removed from settings.gradle.kts.
The shared module has a jvm() target configured, which will make the desktop preview available.
Adding the RoboVM target
Next, using File -> New -> Module, create a new module named robovmApp using RoboVM iOS App with UIScene life-cycle.
This will create a Java project and a Groovy build script.
All of this has to be tweaked and converted to a Kotlin infrastructure by adapting the following:
- Make sure
include(":robovm-app")is added to thesettings.gradle.ktsfile; - Add the Sonatype snapshot repository to
settings.gradle.kts:
pluginManagement {
    repositories {
        # other repositories
        maven("https://central.sonatype.com/repository/maven-snapshots")
    }
}

dependencyResolutionManagement {
    repositories {
        # other repositories
        maven("https://central.sonatype.com/repository/maven-snapshots")
    }
}
- Delete
robovmApp/build.gradle; - Create
robovmApp/build.gradle.ktsand paste the following content:
buildscript {
    repositories {
        mavenLocal()
        mavenCentral()
        gradlePluginPortal()
        maven("https://central.sonatype.com/repository/maven-snapshots")
    }
    dependencies {
        classpath(libs.robovm.gradle.plugin)
    }
}
plugins {
    alias(libs.plugins.kotlinJvm)
    alias(libs.plugins.composeCompiler)
}
apply(plugin = "robovm")

dependencies {
    implementation(project(":shared"))

    implementation(libs.robovm.rt)
    implementation(libs.robovm.cocoatouch)
    implementation(libs.robovm.compose.interop)
}
- Add the following entries to
gradle/libs.versions.toml:
[versions]
#### robovm related
robovm = "10.2.2.5-SNAPSHOT"
robovm-compose-interop="1.11.1.0-SNAPSHOT" # IMPORTANT: This version must match the Compose Multiplatform version

[libraries]
#### robovm related
robovm-gradle-plugin = { module = "com.robovmx:robovm-gradle-plugin", version.ref = "robovm" }
robovm-rt = { module = "com.robovmx:robovm-rt", version.ref = "robovm" }
robovm-cocoatouch = { module = "com.robovmx:robovm-cocoatouch", version.ref = "robovm" }
robovm-compose-interop = { module = "io.github.dkimitsa.robovm:robovm-compose-interop", version.ref = "robovm-compose-interop" }
- Convert
Main.javato Kotlin (using IntelliJ IDEA’s menu “Code” -> “Convert Java to Kotlin”). - Remove
MyViewController.java. - Adjust
SceneDelegateinMain.ktto useRoboVmComposeViewControllerand provide@Composablecontent to it.
override fun willConnect(scene: UIScene?, session: UISceneSession?, connectionOptions: UISceneConnectionOptions?) {
  if (scene is UIWindowScene) {
    val windowScene = scene

    // Set up the view controller.
    rootViewController = RoboVmComposeViewController {
      Box(Modifier.fillMaxSize(), contentAlignment = Alignment.Center) {
        Text("Hello World")
      }
    }
  }
}
The trick with previews
Previews will not work with code inside the robovmApp module (tooling is intentionally not included in robovm-compose-interop).
The trick is to keep all the UI inside the shared module and use it from the robovmApp module.
Sample project
A ready-to-use sample project is available on GitHub: codesnippets/compose-demo-app.
To run it, use the following command (make sure to use the most recent RoboVMx snapshot, as some fixes are required to run Compose Multiplatform on RoboVM):
./gradlew –info :robovm-app:launchIPhoneSimulator
Comments